A very Merry Christmas to you.
Sunday, December 23, 2012
Merry Christmas!
May you have a peaceful few days...
 not forgetting the reason for this wonderful holiday.
A very Merry Christmas to you.
A very Merry Christmas to you.
Saturday, December 22, 2012
Seven Fish Dishes Dessert: Snowball Sundaes
The seven fish dishes are done, and your guests should be lolling about with satisfied smiles and full bellies. (True
to form, my girlies would be out in the kitchen, finishing up any
leftover Angels on Horseback. They love those little guys.)
Time for a light dessert -- something that's festive, but not heavy. Snowball sundaes fit the bill; when the girls were little, we'd have these the first day it snowed in the season.
SNOWBALL SUNDAES
vanilla or chocolate chip ice cream
coconut
chopped pecans
creme de menthe liqueur
whipped cream (the spray stuff is easiest)
one maraschino cherry for each sundae
Use your prettiest clear bowls or parfait glasses for this bright-colored sundae. Scoop out ice cream, roll the scoops in coconut. (This can be done ahead of time, if you've got room to store the cookie sheet full of ice cream 'snowballs.') sprinkle with chopped pecans and drizzle creme de menthe over, then finish with whipped cream and a cherry on top.
Serve with a platter of your nicest Christmas cookies, and an fresh box of chocolates or chocolate-covered nuts. Plus a bowl of fish candy, if you're feeling silly!

Add hot coffee or tea (we'll have espresso), and settle in for an hour of conversation as the candles burn low. It's a lovely way to celebrate Christmas Eve.

Time for a light dessert -- something that's festive, but not heavy. Snowball sundaes fit the bill; when the girls were little, we'd have these the first day it snowed in the season.
SNOWBALL SUNDAES
vanilla or chocolate chip ice cream
coconut
chopped pecans
creme de menthe liqueur
whipped cream (the spray stuff is easiest)
one maraschino cherry for each sundae
Use your prettiest clear bowls or parfait glasses for this bright-colored sundae. Scoop out ice cream, roll the scoops in coconut. (This can be done ahead of time, if you've got room to store the cookie sheet full of ice cream 'snowballs.') sprinkle with chopped pecans and drizzle creme de menthe over, then finish with whipped cream and a cherry on top.
Serve with a platter of your nicest Christmas cookies, and an fresh box of chocolates or chocolate-covered nuts. Plus a bowl of fish candy, if you're feeling silly!
Add hot coffee or tea (we'll have espresso), and settle in for an hour of conversation as the candles burn low. It's a lovely way to celebrate Christmas Eve.
Friday, December 21, 2012
Seven Fish Dishes #7: Refreshers...and the Finale!
By now, you've gone through six different fish and seafood dishes in our Seven Fish Dishes celebration...and your guests are starting to get full! A few refreshers will help clear their palates between courses, and keep them going strong for the finish line. Here's what I'll serve:
Peach Sorbet: sounds fancier than it is. Take a bag of frozen peaches, thawed slightly (about a pound), add 2-3 tablespoons of sugar or honey, and blenderize to a 'ice cream' consistency. (Strawberries and raspberries work well with this, too. So does melon.) Serve in small portions...you've got eight people to cover!
(Short-cut alternative: serve applesauce or lime sherbet, instead.)
Crudites: fresh celery, sliced peppers, radishes...anything crunchy and not too strongly-flavored.
Green salad: Keep it simple -- sliced romaine with some artichoke hearts, perhaps some sliced mushrooms, and a viniagrette dressing. Nothing heavy.
Fresh fruit: grapes, mandarin oranges (they're on sale, after all), a slice or two of fresh apple, blueberries or raspberries...
Plus:
Hot rolls or biscuits.
A simple vegetable dish -- asparagus or green beans, perhaps, dressed lightly with butter and lemon juice. (Have you noticed how the flavors of garlic, lemon juice and butter repeat through this menu? Multiple dishes should have some flavor tie-in for the palate to recognize...)
Light drinks, e.g. sparkling fruit juice or wine. Nothing heavy.
They'll need their strength, because there's one more course to come...and it's the best! It's adapted from Allrecipes.com; you'll find the original, plus more crab recipes on the same page.
LOBSTER OR CRAB NEWBURG
Directions
- Melt butter in a skillet over medium heat. Add crab or lobster, stir gently for a few minutes, then add everything else, continuing to stir until mixture thickens. Do not let it come to a boil; keep at a low simmer. Serve with melba toast or rye krisp...or the remains of the rice from the earlier dishes. You're done! Tomorrow: Dessert
Thursday, December 20, 2012
Seven Fish Dishes #6: Calamari
Calamari is the next dish up on our Seven Fish Dishes adventure. What exactly are we talking about?
'Calamari' is the fancy name for...squid!
Actually, although there are 300 different species, most squid eaten look more like this:
The good news is that calamari, cooked quickly, are some of the most delicate seafood you'll ever put in your mouth. Cook them a long time, and you might as well gnaw on a rubber band. They're reasonably priced, especially if you buy them from an Oriental foods store.
CALAMARI STIR-FRY
frozen calamari - 1-2 pounds - thawed and sliced
(remember: we're serving 8 people, but this is just one of several courses)
olive oil
2 green onions, sliced
1 green or red pepper, chopped
1 tomato, chopped (optional)
1 teaspoon garlic
2 tablespoons chopped cilantro
2 tablespoons lemon juice
Got everything ready? This won't take long. Coat your pan to sizzling with olive oil, then toss everything but the cilantro in. Stir-fry approx. 3 minutes, until the calamari is tender to the bite, and the vegetables are still bright and somewhat crisp. Sprinkle cilantro on top, spritz on the lemon juice, and serve with rice. Yum.
(For a whole aquarium of calamari recipes, go here to the ifood network -- lots to choose from.)
Tomorrow: the Seven Fish Dishes finale!
'Calamari' is the fancy name for...squid!
 |
| Well, maybe it's not as big as this giant specimen from the Melbourne museum. (Thanks, Wikipedia.) |
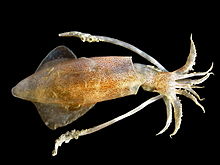 |
| Fishermen will catch these - and bite them on the head to subdue them. Weird. |
CALAMARI STIR-FRY
frozen calamari - 1-2 pounds - thawed and sliced
(remember: we're serving 8 people, but this is just one of several courses)
olive oil
2 green onions, sliced
1 green or red pepper, chopped
1 tomato, chopped (optional)
1 teaspoon garlic
2 tablespoons chopped cilantro
2 tablespoons lemon juice
Got everything ready? This won't take long. Coat your pan to sizzling with olive oil, then toss everything but the cilantro in. Stir-fry approx. 3 minutes, until the calamari is tender to the bite, and the vegetables are still bright and somewhat crisp. Sprinkle cilantro on top, spritz on the lemon juice, and serve with rice. Yum.
(For a whole aquarium of calamari recipes, go here to the ifood network -- lots to choose from.)
Tomorrow: the Seven Fish Dishes finale!
Seven Fish Dishes #5: Shrimp Scampi
One of the highlights every year of our Seven Fish Dish dinner is
shrimp. Our family loves this lively crustacean to distraction, and will
eat it anytime, anywhere.
A special favorite is scampi, loaded with butter and garlic, and a kiss of wine. Tip: most shrimp dishes are overcooked! Better to saute the shrimp quickly until barely pink, then turn the heat off and let the scampi continue to cook in the hot sauce. It gives the shrimp a delicate texture and great flavor.
SHRIMP SCAMPI, BRICK-STYLE
(serves 8, as part of a multi-course dinner)
2 pounds medium to large shrimp, peeled
(cooking with the shells on adds flavor, but makes for a messier dish)
1 1/2 sticks salted butter (3/4 cup)
3 tablespoons chopped fresh or dried garlic
1/2 cup white or rose wine (or substitute chicken broth)
pasta or rice...or a good crunchy piece of garlic toast, to soak up the juices
Melt the butter, add garlic -- then toss in the shrimp. Saute until barely pink; add wine and bring to a brisk simmer. Turn heat off, cover, and let shrimp steam/cook in the sauce until ready. (About 5 min.) Serve over pasta or rice, or piled in a bowl. (Some people like to garnish their scampi with Parmesan cheese, as well.) Don't worry about leftovers -- you won't have any.
Tomorrow: Calamari
A special favorite is scampi, loaded with butter and garlic, and a kiss of wine. Tip: most shrimp dishes are overcooked! Better to saute the shrimp quickly until barely pink, then turn the heat off and let the scampi continue to cook in the hot sauce. It gives the shrimp a delicate texture and great flavor.
 |
| This version is from Food.com - and the recipe's here |
(serves 8, as part of a multi-course dinner)
2 pounds medium to large shrimp, peeled
(cooking with the shells on adds flavor, but makes for a messier dish)
1 1/2 sticks salted butter (3/4 cup)
3 tablespoons chopped fresh or dried garlic
1/2 cup white or rose wine (or substitute chicken broth)
pasta or rice...or a good crunchy piece of garlic toast, to soak up the juices
Melt the butter, add garlic -- then toss in the shrimp. Saute until barely pink; add wine and bring to a brisk simmer. Turn heat off, cover, and let shrimp steam/cook in the sauce until ready. (About 5 min.) Serve over pasta or rice, or piled in a bowl. (Some people like to garnish their scampi with Parmesan cheese, as well.) Don't worry about leftovers -- you won't have any.
Tomorrow: Calamari
Wednesday, December 19, 2012
Seven Fish Dishes #4: Baked Trout with Herb Stuffing
Hopefully you're enjoying the slow parade of fish dishes for the Seven Fish Dish dinner...and thinking of starting your own celebration, as well!
Today's rendition focuses on one of the Rocky Mountain's tastiest pescatorial foods: firm, fresh trout. They're found in our streams and reservoirs -- and they're good.
This version stretches out with crunchy herb stuffing, that contributes to the trout's good flavor. Alice Koklas, Gertrude Stein's partner, baked her trout wrapped in crepes, and called it "Trout in Sweaters." Does that make this dish "Stuff It Trout?" Who cares -- it's delicious, by any name.
BAKED TROUT WITH HERB STUFFING
3 trout, approx. 1 pound each, heads on
(normally, you'd figure a half-pound or full pound trout per person. But since we've had 3 fish dishes already, with 3 more to go after this, eight or nine people will divide this amount nicely)
1 cup chopped onion
1 cup sliced mushrooms
1 cup chopped celery
1/2 cup fresh herbs -- rosemary, sage, marjoram OR
1 tablespoon each of these herbs, dried
1 cup chicken broth (or one chicken bouillon cube dissolved in 1 cup hot water)
3 cups bread crumbs (day-old bread, left out a bit so it crumbles easily)
1 teaspoon salt
1 stick butter
1 tablespoon lemon juice
Heat your oven to 350 degrees. (Yes, you can cook this dish at the same time as yesterday's Teriyaki Salmon.)
Wash the trout inside and out, and lay in an ovenproof serving dish
Melt the butter in a frying pan; set aside a tablespoon or so for basting the fish later. Saute the vegetables and herbs a few minutes (but still crunchy) -- stir in broth, breadcrumbs and salt until the crumbs are absorbed, and everything is mixed well. (Add a little more water, if needed - mixture should be moist, but not soggy.)
Carefully push stuffing inside the fish, then arrange the remaining stuffing around them. Drizzle the reserved butter over the fish, then sprinkle with lemon juice and a little extra chopped herbs.
Bake approx. 30 min., until the fish is white and flakes easily. Don't overbake -- just cover, and set at the back of the stove to keep warm until ready to serve.
Tomorrow: Shrimp Scampi
Today's rendition focuses on one of the Rocky Mountain's tastiest pescatorial foods: firm, fresh trout. They're found in our streams and reservoirs -- and they're good.
This version stretches out with crunchy herb stuffing, that contributes to the trout's good flavor. Alice Koklas, Gertrude Stein's partner, baked her trout wrapped in crepes, and called it "Trout in Sweaters." Does that make this dish "Stuff It Trout?" Who cares -- it's delicious, by any name.
 |
| This photo from troutrecipes.org - and many more great dishes! Click here for more. |
BAKED TROUT WITH HERB STUFFING
3 trout, approx. 1 pound each, heads on
(normally, you'd figure a half-pound or full pound trout per person. But since we've had 3 fish dishes already, with 3 more to go after this, eight or nine people will divide this amount nicely)
1 cup chopped onion
1 cup sliced mushrooms
1 cup chopped celery
1/2 cup fresh herbs -- rosemary, sage, marjoram OR
1 tablespoon each of these herbs, dried
1 cup chicken broth (or one chicken bouillon cube dissolved in 1 cup hot water)
3 cups bread crumbs (day-old bread, left out a bit so it crumbles easily)
1 teaspoon salt
1 stick butter
1 tablespoon lemon juice
Heat your oven to 350 degrees. (Yes, you can cook this dish at the same time as yesterday's Teriyaki Salmon.)
Wash the trout inside and out, and lay in an ovenproof serving dish
Melt the butter in a frying pan; set aside a tablespoon or so for basting the fish later. Saute the vegetables and herbs a few minutes (but still crunchy) -- stir in broth, breadcrumbs and salt until the crumbs are absorbed, and everything is mixed well. (Add a little more water, if needed - mixture should be moist, but not soggy.)
Carefully push stuffing inside the fish, then arrange the remaining stuffing around them. Drizzle the reserved butter over the fish, then sprinkle with lemon juice and a little extra chopped herbs.
Bake approx. 30 min., until the fish is white and flakes easily. Don't overbake -- just cover, and set at the back of the stove to keep warm until ready to serve.
Tomorrow: Shrimp Scampi
Tuesday, December 18, 2012
Seven Fish Dishes #3: Teriyaki Salmon
The Seven Fish Dishes are heading into main course territory now! (Be sure to take a look at the others in previous posts this week: Angels and Horseback and New England-style Clam Chowder.)
Salmon is our oldest daughter's absolute favorite...and a luxury around here, unless you happen to find it on sale, or marked down. Funny...I grew up in Michigan, where our cousins would bring us pounds and pounds of the stuff, after fishing expeditions on Lake Michigan. We ate so much salmon back then that I thought of it as more common than tunafish.
Not anymore.
Bear in mind: you've got four more fish dishes to go on this list, so you don't need a huge amount of salmon. A few pounds will do nicely to feed 8-10 people. Serve it with a small mound of rice, to catch the juices.
 |
| This version is from Taste of Home -- plus the recipe |
2 pounds salmon filets, or sliced salmon
(or enough for one palm-sized piece per person. Palm-sized -- not the entire hand)
Sauce*:
1 squeezed lemon
1/4 cup soy sauce
1/4 cup rice wine or cooking sherry
1 small piece grated or chopped fresh ginger
1 small can crushed pineapple (keep the juice)
1 teaspoon garlic
Drain the pineapple; set aside most of the fruit for another day. (Or use it as garnish on the platter.) Mix all sauce ingredients together, then pour over salmon; let marinate at least 30 min., or all day, if possible.
Grill the salmon, or cook in a 350 degree oven, along with another Seven Fish Dishes entree. It takes about 10 min. on the grill, and 20-25 min. in the oven. Don't overcook! Fish should be moist, and flake easily.
*Not in the mood to make your own sauce? Soy Vay makes an incredible teriyaki, in two different flavors. Warning: it's so good, you'll want more -- I find myself spooning out a tablespoon or two of Island Teriyaki now and then as a snack. I'm hooked now; you can still save yourself.
Monday, December 17, 2012
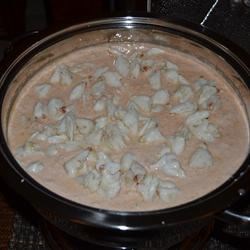
Seven Fish Dishes #2: Old-Fashioned Clam Chowder
Seven fish dishes on Christmas Eve...an Italian way to celebrate the season. Yesterday was the appetizer for this holiday meal; you'll want a good, hearty soup to keep your diners occupied while the rest of the dishes cook.
This New England-style clam chowder fits the bill -- it's thick and tasty. A good-sized cup or bowl of this fills up your guests, and lets you serve less of the more expensive seafood dishes.
Try this chowder on a cold winter night, when it's raining or sleeting, accompanied by melted cheese on a hard roll. It's wonderfully filling.
(by the way, this chowder signals its colonial origins by using milk or cream...if it were Manhattan-style, instead of New England-style, it would use tomatoes.)
NEW ENGLAND CLAM CHOWDER
1 can minced clams (12-16 oz., depending on your budget)
8 cups milk (if you're ok about calories, make 2 cups of this cream, instead)
3 chopped potatoes
1 chopped onion
4 tablespoons butter
salt and pepper
Dump the clams, along with their juice, in a saucepan, along with half of the milk. (If you made Angels on Horseback, add their broth, as well.) Simmer potatoes and onions in this mixture until tender, about 15 min. Add the rest of the milk, then bring the soup back up to a low simmer. (Overheating can curdle the milk, or form an unappetizing skin on the surface.) Add the butter; salt and pepper to taste; and ladle out when the butter has melted. (Or dish the soup and add a pat of butter to each serving, instead.)
Serves 8 as a first course. (Some East Coast cooks also add a tablespoon or two of chopped crisp bacon. A handful of oyster crackers is a traditional accompaniment.)
Tomorrow: now we're starting to cook! Course #3: Teriyaki Salmon
This New England-style clam chowder fits the bill -- it's thick and tasty. A good-sized cup or bowl of this fills up your guests, and lets you serve less of the more expensive seafood dishes.
Try this chowder on a cold winter night, when it's raining or sleeting, accompanied by melted cheese on a hard roll. It's wonderfully filling.
 |
| photo from Betty Crocker.com - and another version here |
NEW ENGLAND CLAM CHOWDER
1 can minced clams (12-16 oz., depending on your budget)
8 cups milk (if you're ok about calories, make 2 cups of this cream, instead)
3 chopped potatoes
1 chopped onion
4 tablespoons butter
salt and pepper
Dump the clams, along with their juice, in a saucepan, along with half of the milk. (If you made Angels on Horseback, add their broth, as well.) Simmer potatoes and onions in this mixture until tender, about 15 min. Add the rest of the milk, then bring the soup back up to a low simmer. (Overheating can curdle the milk, or form an unappetizing skin on the surface.) Add the butter; salt and pepper to taste; and ladle out when the butter has melted. (Or dish the soup and add a pat of butter to each serving, instead.)
Serves 8 as a first course. (Some East Coast cooks also add a tablespoon or two of chopped crisp bacon. A handful of oyster crackers is a traditional accompaniment.)
Tomorrow: now we're starting to cook! Course #3: Teriyaki Salmon
Sunday, December 16, 2012
Seven Fish Dishes #1: Angels on Horseback
Fish...fish for Christmas?
One of Italy's customs is to serve seven different fish dishes on Christmas Even...to honor the Seven Sacraments. (birth, confirmation, marriage and so on...)
When our girlies were small, I took each year to explore different countries' holiday foods. The year we focused on Italy, I started the Fish Dishes. Everyone enjoyed them so much that we've continued serving seven fish dishes on each Christmas Eve, inviting friends and family to join us. (And we're not even Catholic!)
This week will feature a new fish recipe every day, including some of the Bricks' favorites. Because Husband and I were usually helping out with music during the Christmas Eve services, many of our dishes were simple to make -- like this one.
Technically,
Angels on Horseback are oysters wrapped in bacon, then baked in a hot
oven, or grilled. They go well with Devils on Horseback...and a cold
glass of wine or champagne to start the mood.
ANGELS ON HORSEBACK
1 large jar (8 oz) fresh oysters
1 pound thick-cut sliced bacon
toothpicks
1 lemon
Yes, that's it! Here in Colorado, our fresh oysters are from the Pacific -- and they're large. They need to be cut in several pieces for use. Eastern oysters are much smaller, and can be used individually.
Rinse the oysters. (Save the juice in the jar for your soup -- see tomorrow's recipe.) Cut the bacon slices in half. Wrap each oyster (or oyster piece) in a bacon slice, and secure with a toothpick. Place on metal cookie sheet.
Once all the Angels are done, squeeze fresh lemon juice over. Bake in a hot (400 degree) oven 15 min., serve sizzling on a platter garnished with fresh greens. Serves about 7 people as an appetizer, or 4 people as a single course.
DEVILS ON HORSEBACK: Substitute one pound of chicken livers for the oysters. (Some recipes use scallops, instead.)
Brace yourself, and on to the next fish dish:
Clam Chowder (tomorrow)
One of Italy's customs is to serve seven different fish dishes on Christmas Even...to honor the Seven Sacraments. (birth, confirmation, marriage and so on...)
When our girlies were small, I took each year to explore different countries' holiday foods. The year we focused on Italy, I started the Fish Dishes. Everyone enjoyed them so much that we've continued serving seven fish dishes on each Christmas Eve, inviting friends and family to join us. (And we're not even Catholic!)
This week will feature a new fish recipe every day, including some of the Bricks' favorites. Because Husband and I were usually helping out with music during the Christmas Eve services, many of our dishes were simple to make -- like this one.
 |
| photo from Simply Recipes; another version is here. |
ANGELS ON HORSEBACK
1 large jar (8 oz) fresh oysters
1 pound thick-cut sliced bacon
toothpicks
1 lemon
Yes, that's it! Here in Colorado, our fresh oysters are from the Pacific -- and they're large. They need to be cut in several pieces for use. Eastern oysters are much smaller, and can be used individually.
Rinse the oysters. (Save the juice in the jar for your soup -- see tomorrow's recipe.) Cut the bacon slices in half. Wrap each oyster (or oyster piece) in a bacon slice, and secure with a toothpick. Place on metal cookie sheet.
Once all the Angels are done, squeeze fresh lemon juice over. Bake in a hot (400 degree) oven 15 min., serve sizzling on a platter garnished with fresh greens. Serves about 7 people as an appetizer, or 4 people as a single course.
DEVILS ON HORSEBACK: Substitute one pound of chicken livers for the oysters. (Some recipes use scallops, instead.)
Brace yourself, and on to the next fish dish:
Clam Chowder (tomorrow)
Saturday, December 15, 2012
Christmas Cookies: Lollipop Cookies
Crunchy sugar cookies on a stick...imagine them decorating a cake, or
wrapped and tucked in your favorite kid's Christmas stocking. (Me --
pick me!)
P.S. Don't use my otherwise-favorite sugar cookie recipe for this, unless you overbake the cookies -- they're too soft to hold up to the pressure.
LOLLIPOP COOKIES

Real Simple magazine, the passer-on of this recipe, has a raftful of easy Christmas cookies -- look here for the slideshow and recipes.
P.S. Don't use my otherwise-favorite sugar cookie recipe for this, unless you overbake the cookies -- they're too soft to hold up to the pressure.
LOLLIPOP COOKIES
Makes 16 cookies|
Hands-On Time:
25m|
Total Time:
1hr 30m
Ingredients
- 1 1/4 cups all-purpose flour, spooned and leveled
- 3/4 teaspoon baking powder
- 1/4 teaspoon kosher salt
- 8 tablespoons (1 stick) unsalted butter, at room temperature
- 1 cup granulated sugar
- 1 large egg
- 1 teaspoon pure vanilla extract
- 1 3/4 cups confectioners’ sugar
- food coloring
- mini jelly beans, colored sprinkles, or metallic dragees, for decorating
- special equipment: 14 6- to 8-inch lollipop or ice-pop sticks (found in large craft stores -- wooden skewers may be substituted, but you might need more than one per cookie)
Directions
- Heat oven to 350° F. Line 2 baking sheets with parchment. In a medium bowl, whisk together the flour, baking powder, and salt; set aside.
- With an electric mixer, beat the butter and granulated sugar at medium speed until creamy, about 3 minutes. Add the egg and vanilla extract and mix until combined. Reduce the mixer speed to low and gradually mix in the flour mixture just until combined (do not overmix).
- Drop mounds of the dough (about 2 tablespoons each) onto the prepared baking sheets, spacing them 4 inches apart. Insert one end of a lollipop stick into each and flatten the dough slightly with your fingers. Bake the cookies, rotating the baking sheets halfway through, until golden, 8 to 10 minutes. Cool 5 minutes on the baking sheets, then transfer to wire racks to cool completely.
- In a small bowl, mix together the confectioners’ sugar, 2 tablespoons water, and 1 to 2 drops food coloring. Drizzle the cookies with the icing and sprinkle with the candies and sprinkles. Let dry for at least 30 minutes.
- Storage suggestion: Keep at room temperature, between sheets of wax paper in an airtight container, for up to 1 week. (Alternatively, wrap in a nonsealing plastic sandwich bag or cellophane bag and close with a twist tie or a ribbon.)
Real Simple magazine, the passer-on of this recipe, has a raftful of easy Christmas cookies -- look here for the slideshow and recipes.
Thursday, December 13, 2012
Christmas Cookies: Spritz!
Want a pretty, easy-to-make cookie that really dresses up your
platter? Spritz, otherwise known as 'Swedish Butter Cookies,' fit the
bill. The Mama made dozens of these to give away, as well as feed her
hungry family. They can easily be decorated with frosting and sprinkles,
as seen below. But I like them all by themselves, as well.
Don't let the idea of a cookie press scare you. Think of a giant 'frosting tube' that pushes the dough through a ridged plate, right onto the cookie sheet. Think of how fast you can squeeze these little guys out!
(For more Spritz variations, visit the Wilton page, where this recipe started.)

Try not to eat them all at once.
Don't let the idea of a cookie press scare you. Think of a giant 'frosting tube' that pushes the dough through a ridged plate, right onto the cookie sheet. Think of how fast you can squeeze these little guys out!
(For more Spritz variations, visit the Wilton page, where this recipe started.)
CLASSIC SPRITZ COOKIES
Ingredients:
- 3 1/2 cups all-purpose flour
- 1 teaspoon baking powder
- 1 1/2 cups butter softened
- 1 cup granulated sugar
- 1 egg
- 2 tablespoons milk
- 1 teaspoon vanilla
- 1/2 teaspoon almond flavoring(The Mama would often add 2 or 3 tablespoons of red or green jello mix to a batch, making pretty colored cookies. Use the whole package if you like a stronger color.)
Makes:
7-8 dozen cookies.Tools needed:
Instructions:
Step 1
Preheat oven to 350ºF.Step 2
In bowl, combine flour and baking powder. In large bowl, beat butter and sugar with electric mixer until light and fluffy. Add egg, milk, vanilla and almond extract; mix well. Gradually add flour mixture to butter mixture; beat until combined. Do not chill. Fill cookie press with dough and with desired disks, press cookies onto ungreased cookie sheet.Step 3
Bake 10-12 minutes or until edges are light golden brown. Cool 2 minutes on cookie sheet on cooling rack. Remove from sheet; cool completely.Try not to eat them all at once.
Tuesday, December 11, 2012
Christmas Cookies: No-Gluten Peanut Butter Cookies
There's nothing better on a cold winter day than a peanut butter cookie, straight from the oven, with a hot cup of tea. But wait -- do you have to forego this pleasure if you're on a low-gluten diet?
Nope.
These peanut butter cookies don't have one lick of flour included. And they don't need it. Try one or more of these crunchy, wonderful treats for your next party -- the 'who cares about gluten' guests won't even notice the difference.
NO-GLUTEN PEANUT BUTTER COOKIES
2 cups smooth peanut butter
Beat the peanut butter, slowly adding sugar as you mix. Add vanilla and eggs, and mix well.
Drop by spoonfuls onto a greased cookie sheet.
Bake at 350°F degrees for about 12-15 minutes or until lightly browned.
Makes about two dozen cookies.
Nope.
These peanut butter cookies don't have one lick of flour included. And they don't need it. Try one or more of these crunchy, wonderful treats for your next party -- the 'who cares about gluten' guests won't even notice the difference.
NO-GLUTEN PEANUT BUTTER COOKIES
2 cups smooth peanut butter
(for a crunchier version, use chunky peanut butter -- and add a sprinkling of chopped nuts on top of the dough spoonfuls before baking)
2 cups granulated sugar
1 teaspoon vanilla
2 eggs (if you're lucky, they'll be from chickens in your backyard)
2 eggs (if you're lucky, they'll be from chickens in your backyard)
Drop by spoonfuls onto a greased cookie sheet.
Bake at 350°F degrees for about 12-15 minutes or until lightly browned.
Makes about two dozen cookies.
| Serve these to your favorite Christmas elf -- they'll be thrilled! |
Monday, December 10, 2012
Christmas Cookies: Linzer Tarts
It's nice to be back, sharing Holiday Goodies! Our major focus this Christmas season will be foods from many different countries. What's your cultural tradition -- share please!
Meanwhile, here's the first item: a delicious, almond-and-jam tart.
Parade Magazine just posted the 5 winners of their Christmas Cookie contest...and boy, do they look delicious!
This recipe, from William Blades of New Milford, Conn., is the winner of the Rolled and Cut Category in PARADE's 2012 Holiday Cookie Bake-Off, and fits nicely into this year's cultural theme. He categorizes them as Scandinavian; I know them better from Austria, where they're made (and savoured) in great quantities. Either way, they're delicious.
Click here to view all of the winning recipes from the Parade contest.
William's story: "My mom was a true Scandinavian and a great baker; I loved her Linzer tarts. Thirteen years ago, my friend John gave me a batch of these cookies for Christmas. With one taste, I was in heaven. Through the years, we've perfected this recipe together. I was taught that food is love. When you make food for someone, you share your love."
To buy the R&M Winter Fantasy Linzer Cookie Cutter Set Parade used to make this cookie, click here.
Or go to the Parade cookie page. (Yum)
LINZER TARTS

 Makes 24. Per Serving: 140 calories, 20g carbs, 2g protein, 6g fat, 20mg cholesterol, 40mg sodium, 1g fiber

Meanwhile, here's the first item: a delicious, almond-and-jam tart.
Parade Magazine just posted the 5 winners of their Christmas Cookie contest...and boy, do they look delicious!
This recipe, from William Blades of New Milford, Conn., is the winner of the Rolled and Cut Category in PARADE's 2012 Holiday Cookie Bake-Off, and fits nicely into this year's cultural theme. He categorizes them as Scandinavian; I know them better from Austria, where they're made (and savoured) in great quantities. Either way, they're delicious.
Click here to view all of the winning recipes from the Parade contest.
William's story: "My mom was a true Scandinavian and a great baker; I loved her Linzer tarts. Thirteen years ago, my friend John gave me a batch of these cookies for Christmas. With one taste, I was in heaven. Through the years, we've perfected this recipe together. I was taught that food is love. When you make food for someone, you share your love."
To buy the R&M Winter Fantasy Linzer Cookie Cutter Set Parade used to make this cookie, click here.
Or go to the Parade cookie page. (Yum)
LINZER TARTS
ingredients: Add all to shopping list
3/4 cup unsalted almonds
1 1/2 cups sifted flour, divided
1/2 cup (1 stick) salted or unsalted butter, at room temperature
1/2 cup confectioners' sugar
1 tsp grated lemon zest
1 egg
Raspberry jam (apricot jam is also excellent)
Sifted confectioners' sugar, for dusting
1 1/2 cups sifted flour, divided
1/2 cup (1 stick) salted or unsalted butter, at room temperature
1/2 cup confectioners' sugar
1 tsp grated lemon zest
1 egg
Raspberry jam (apricot jam is also excellent)
Sifted confectioners' sugar, for dusting
At a glance:
Servings:
Makes 24
Active Time: 25 min
Total Time: 1 hr 5 min (plus cooling time)
Key Tags:
Active Time: 25 min
Total Time: 1 hr 5 min (plus cooling time)
Key Tags:
directions:
1. In a mini-chopper or blender, chop
almonds with 1/4 cup flour until fine (should take less than 30 seconds;
for a crunchier, nuttier cookie, chop for just 15 to 20 seconds).
2. In a medium bowl, combine nut mixture, remaining flour, butter, confectioners' sugar, zest, and egg. Mix well.
3. Divide dough in half; wrap in plastic. Chill for at least 1/2 hour.
4. Preheat oven to 350°F.
5. Roll out dough halves on a floured surface. Using small round cookie cutters, cut out cookie bottoms and tops. With a patterned cutter (we use a snowflake shape), punch a center hole in tops.
6. Bake for 8 to 10 minutes or until light gold. Watch carefully. Cool on a wire rack. Spread a thin layer of jam on each bottom cookie; sandwich with tops, pressing gently. Dust with sifted confectioners' sugar.
KITCHEN COUNTER:
2. In a medium bowl, combine nut mixture, remaining flour, butter, confectioners' sugar, zest, and egg. Mix well.
3. Divide dough in half; wrap in plastic. Chill for at least 1/2 hour.
4. Preheat oven to 350°F.
5. Roll out dough halves on a floured surface. Using small round cookie cutters, cut out cookie bottoms and tops. With a patterned cutter (we use a snowflake shape), punch a center hole in tops.
6. Bake for 8 to 10 minutes or until light gold. Watch carefully. Cool on a wire rack. Spread a thin layer of jam on each bottom cookie; sandwich with tops, pressing gently. Dust with sifted confectioners' sugar.
Thursday, November 22, 2012
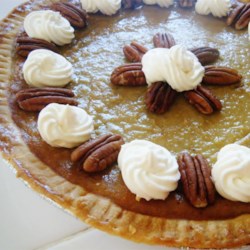
Thanksgiving Goodies: Spice Cake
Pies are a mainstay of Thanksgiving -- pumpkin, pecan and everything in between. But among your guests, there will always be a cake person: someone who loves a tender, moist slice of chocolate, carrot or Whatever.
This cake echoes the traditional spices of autumn -- ginger, cinnamon, cloves and nutmeg -- yet keeps everything light. You can fancy-lace the frosting, like the version shown below, or just serve it with a light dusting of powdered sugar. Either way, it's delicious.
(see the full page at All Recipes.com)
SPICE CAKE
(16 servings, cut thin -- or 8, cut thick)
-
- Adjust oven rack to middle position and heat oven to 350 degrees. Grease and lightly flour a metal or disposable foil 9-by-13-inch pan. Whisk dry ingredients and spices in a large bowl. Mix milk, eggs and vanilla extract in a 2-cup measuring cup.
- Beat softened butter into dry ingredients, first on low, then medium, until mixture forms pebble-sized pieces. Add about 1/3 of the milk mixture and beat on low until smooth. Add remaining milk mixture in two stages; beat on medium speed until batter is just smooth. Add the sugar; beat until just incorporated, about 30 seconds. Pour batter into cake pan.
- Bake until a cake tester or toothpick inserted into the cake's center comes out clean, about 40 minutes. Set pan on a wire rack; let cool for 5 minutes. Run a knife around the pan perimeter and turn cake onto rack. Let cool. Frost as desired -- a good basic frosting recipe is here -- or not. This cake goes especially well with coffee or hot tea.
Wednesday, November 21, 2012
Thanksgiving Goodies: Talking Turkey
Where would we be this Thanksgiving season (and Christmas, for that matter) without a juicy, tender bronzed turkey on the platter!
Well, the turkey part's not that hard -- but getting it juicy and tender is a whole different matter. Sawing through your share of white, dry sawdust meat just makes you thankful that gravy is also on the Thanksgiving menu.
The secret? Moisture. Lots of it.
*Baste or rub your turkey inside and out with olive oil or butter. I'll sprinkle on a generous handful of herbs afterward, including crumbled sage from our garden, marjoram and some basil.
*If you're not stuffing the bird, add an onion, apple or both inside. (Some people like bay leaves, too.)
*Add at least two cups of water in the bottom of the pan -- and cover your bird. The steam keeps the meat tender, adds more liquid for broth purposes, and won't interfere with browning.
I've also tried 'spatchcocking' the turkey -- cutting it down the breastbone so the bird lays flat. (Think 'butterflied.') This cooks it faster, so the meat doesn't dry out as quickly.
Trisha Yearwood suggested overnight cooking:
*Rub your bird inside and out with butter. Add moist fruit or veggies inside. Put it in a covered roasting pan, along with two cups of water. Turn the oven up to 500 degrees, and bake for an hour. Turn the oven off, and go to bed. DON'T PEEK. In the morning (5-7 hours later), your turkey will be done!
Trisha says it produces the juiciest bird she's ever made. We'll try this method, and find out.
Here's a good basic 'Two-Hour Turkey' recipe, courtesy of Safeway:
(see the full page here)

Makes: 8-10 servings
Well, the turkey part's not that hard -- but getting it juicy and tender is a whole different matter. Sawing through your share of white, dry sawdust meat just makes you thankful that gravy is also on the Thanksgiving menu.
The secret? Moisture. Lots of it.
*Baste or rub your turkey inside and out with olive oil or butter. I'll sprinkle on a generous handful of herbs afterward, including crumbled sage from our garden, marjoram and some basil.
*If you're not stuffing the bird, add an onion, apple or both inside. (Some people like bay leaves, too.)
*Add at least two cups of water in the bottom of the pan -- and cover your bird. The steam keeps the meat tender, adds more liquid for broth purposes, and won't interfere with browning.
I've also tried 'spatchcocking' the turkey -- cutting it down the breastbone so the bird lays flat. (Think 'butterflied.') This cooks it faster, so the meat doesn't dry out as quickly.
Trisha Yearwood suggested overnight cooking:
*Rub your bird inside and out with butter. Add moist fruit or veggies inside. Put it in a covered roasting pan, along with two cups of water. Turn the oven up to 500 degrees, and bake for an hour. Turn the oven off, and go to bed. DON'T PEEK. In the morning (5-7 hours later), your turkey will be done!
Trisha says it produces the juiciest bird she's ever made. We'll try this method, and find out.
Here's a good basic 'Two-Hour Turkey' recipe, courtesy of Safeway:
(see the full page here)
Instructions
Prep & Cook Time: About 2 hoursMakes: 8-10 servings
- Remove and discard truss that holds turkey legs together. Pull or trim off and discard any excess fat in neck or body cavity. Remove giblets and neck.
- Rinse turkey inside and out with warm water. Pat dry with paper towels.
- Place the adjustable V-shaped rack in a 13 x 16 x 3-inch roasting pan (set rack sides so the bird is a minimum of 2 inches from pan bottom).
- Rub turkey skin generously all over with olive oil and sprinkle with salt and pepper. Set bird breast-side-up on rack. Pull wings away from body, then firmly twist them to push the wing tips under the bird.
- Using aluminum foil, form caps over the tips of the end of each drumstick. If any parts of the turkey extend beyond pan rim, fashion a foil collar underneath to make sure drippings flow back into pan. Do not tie legs together, add stuffing, or close body cavity.
- Insert an oven-safe meat thermometer near the center of the breast through thickest part until the tip touches bone, which is most accurate spot to check doneness.
- Verify oven temperature and set pan on the lowest rack in a 475° oven. Roast until thermometer reaches 160°. Halfway through roasting time, rotate pan in oven to assure even cooking and browning. If areas on turkey breast start to get browner than you like, lay a piece of foil over the dark areas.
- Remove pan from oven, set in a warm spot, and loosely cover pan with foil to keep it warm. Rearrange oven racks to accommodate potatoes and dressing. Decrease oven temperature to 400º. Let turkey rest 30 to 60 minutes. The resting period will allow the internal temperature to reach 165°, the USDA safe cooking temperature for poultry.
- Drain juices from body cavity (often plentiful in unstuffed birds) into roasting pan. Transfer turkey to a platter or rimmed cutting board. Set aside juices for gravy.
- Cut off turkey legs at thigh joint. If joint is red or pink, return legs to the oven for 3 to 5 minutes (at 300° to 475°) or heat in a microwave oven for 3 to 4 minutes. Carve the rest of the turkey. Carving juices may be clear to pink or rosy; both are fine. Save juices to pour into gravy if desired.
Friday, November 16, 2012
Thanksgiving Goodies: Sweet Tater Pie...and Other Yammy Delights
Gee, it's nice to be back.
Thanksgiving is nearly on our doorstep -- so for the next week, we're going to feature some classic dishes that have been a favorite part of the holiday. First up, it's sweet potatoes (or yams, some would say -- or both), that not-quite-potato-not-quite-squash with the creamy, sweet flavor. Many people like their sweet potatoes mashed in a casserole, with lots of marshmallows on top. If you're more a fan of savoury vs. sweet, try this version. It comes from Megan Woodard...who said she'd eat it with marshmallows -- and without!
Thanksgiving is nearly on our doorstep -- so for the next week, we're going to feature some classic dishes that have been a favorite part of the holiday. First up, it's sweet potatoes (or yams, some would say -- or both), that not-quite-potato-not-quite-squash with the creamy, sweet flavor. Many people like their sweet potatoes mashed in a casserole, with lots of marshmallows on top. If you're more a fan of savoury vs. sweet, try this version. It comes from Megan Woodard...who said she'd eat it with marshmallows -- and without!
Sweet Potato Gratin
1½
cups whipping cream
¼
cup sugar
½
tbsp grated orange peel ½
cup pecan halves
¼
tsp fresh-grated nutmeg
Heat
cream, sugar, orange peel, nutmeg and salt over medium-high heat just until
steaming, about 4 minutes. Peel and
slice potatoes very thinly. Spread in
buttered 1.5-qt casserole (9X9). Pour
hot cream mixture evenly over potatoes.
Bake at 350° for 30 minutes.
Spoon liquid over potatoes, sprinkle evenly with pecans and bake another
30 minutes.
Or there's always Sweet Potato Pie...nothing's better, with a drift of whipped cream. This version comes from Georgia, a state intimately acquainted with sweet potatoes.
 |
| Recipe and photo from Allrecipes.com. For more recipes, visit this page. |
SWEET POTATO PIE, SOUTHERN STYLE
1 - 9 inch pie
Directions
- Boil sweet potato whole in skin for 40 to 50 minutes, or until done. Run cold water over the sweet potato, and remove the skin.
- Break apart sweet potato in a bowl. Add butter, and mix well with mixer. Stir in sugar, milk, eggs, nutmeg, cinnamon and vanilla. Beat on medium speed until mixture is smooth. Pour filling into an unbaked pie crust.
- Bake at 350 degrees F (175 degrees C) for 55 to 60 minutes, or until knife inserted in center comes out clean. Pie will puff up like a souffle, and then will sink down as it cools. All I can say is...yummm.
Wednesday, May 30, 2012
Coffee and Eccles Cakes - with Miss Read
(This was published over at my main blog, A Brickworks Looks At Life. Thought you might enjoy it, too!)
If you're drinking coffee, you're apt to live longer.
The National Institute of Health and AARP's recent study of 400,000 is the largest ever...and surprised the pants off researchers, who expected to show that coffee was the Ever-Growing Kiss of Death. Earlier studies had suggested that coffee raised LDL levels ('bad' cholesterol), as well as blood pressure short-term...and those combined do pose a risk of heart disease.
"Even in the new study," according to the Associated Press article by Marilynn Marchione, "it seemed coffee drinkers were more likely to die at any given time. But they also tended to smoke, drink more alcohol, eat more red meat and exercise less than people who don't drink coffee. Once that was taken into account, a clear pattern emerged: Each cup of coffee per day [caffeine or no caffeine] nudged up the chances of living longer."
They just don't know why. (See the report here.)
While trying to face the day, first cup of coffee in hand, I enjoy a dip now and then in Miss Read's books. Miss Read, in case you're unfamiliar with her, has a whole English countryside of several towns, and vivid characters, waiting to meet you. They're "cosies," snippets and tidbits of these people's activities all year round -- and a refreshing change from your own. Her Christmas stories are unparalleled, too. (The nearest I can get, American-wise, is Jan Karon's work.)
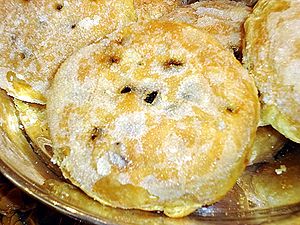
Anyhow, Miss Read's people love to add baked goods to their tea and coffee, including something called 'eccles cakes.' Wikipedia defines them as "a small, round cake filled with currants and made from flaky pastry with butter, which is sometimes topped with demerara sugar." They seem to be something like a date-filled or fruitcake cookie. (The Mama makes a sugar cookie filled with ground raisins that seem to be like these. Looks more like a pancake in the photos, but you eat them out of hand.) Some sources say they're similar to the Banbury cakes of the nursery rhyme...but that doesn't help us Yanks much.
Here's what the Salford City Council, home of the Eccles cake, says about it:
In 1793 James Birch’s shop on the corner of Vicarage Road in Eccles began selling small, flat, raisin-filled cakes. They sold, quite literally, like hot cakes!
Earlier, in 1769, Mrs Elizabeth Raffald, the housekeeper and owner of a confectioner’s shop in Arley Hall, Cheshire, wrote an influential cookery book, "The Experienced English Housekeeper "
which became a best seller. The book contained a recipe for "sweet
patties" with ingredients identifiably similar to the Eccles cakes of
today. Could this have been the recipe seized upon by a cookery-mad
servant girl who took a copy of the book with her when she went to live
in ... Eccles?
"
which became a best seller. The book contained a recipe for "sweet
patties" with ingredients identifiably similar to the Eccles cakes of
today. Could this have been the recipe seized upon by a cookery-mad
servant girl who took a copy of the book with her when she went to live
in ... Eccles?
Whatever the murky origins of the cakes, James Birch was certainly the first person credited with selling them on a commercial basis...
Whether James Birch made a name for his cakes in the 1780s, in 1796, or indeed some time later, is now impossible to say. It is equally impossible to construct a link between James Birch and Elizabeth Raffald (who died four years before the opening of Birch’s shop).
More recently the question of origin of Eccles Cakes has been raised in Parliament. A question was tabled regarding the future of cakes made outside Eccles to the same ingredients. Could non Eccles-made cakes still be referred to (and sold) as Eccles cakes?
How many cakes, cookies or cupcakes do we know that are worthy of being debated in Congress?? Back to the story:
Throughout history, families making Eccles and (the similar) Banbury cakes have all kept their recipes as closely guarded secrets. One of the most famous expressions in Eccles is "The secret dies with me!".
The authors of cookery books would therefore have had to invent their own recipes based on the taste of the cakes they purchased at different shops. 17th Century recipes for Banbury cakes do exist but show that they differ from 19th Century ones. A major difference was the use of yeast which was necessary before the introduction of raising agents.
Although no 18th Century and only a few 19th Century cookery books give recipes specifically for Eccles cakes, it may well be that early ones differ from those known today.
Mrs Raffald’s original recipe for "sweet patties" of 1769 was a mixture of the meat of a boiled calf’s foot (gelatine), plus apples, oranges, nutmeg, egg yolk, currants and French brandy enveloped in a good puff pastry which could be either fried or baked. The use of the word "meat" [or "mincemeat"] in the early recipes serves as a reminder that meat was originally an ingredient in mincemeat.
The fact that Eccles cakes were being exported by 1818 also suggests very good keeping qualities, so they may well have included spirits such as brandy and rum. No wonder the Puritans wanted to ban them.
Well, gee. I'd better go dig that calf's foot out of the freezer, and resurrect the French brandy -- or maybe I'll just use the modern recipe below. Surprise your family with this venerable goodie, or have one yourself, preferably while reading something by Miss Read. (I'd recommend Village School or Christmas Tales, for starters, or the first one I ever read -- Mrs. Pringle.)
ECCLES CAKES (courtesy of the Salford City Council)
Update: While researching this, I discovered Miss Read, aka Dora Saint, died back on April 7 -- just 10 days short of her 99th birthday. She may not have had the notoriety of a Robert Ludlum or Clive Cussler...but her books were never out of print. Reading them, I felt as if I were talking to an old and trusted friend. Take a look at her obituary for more. Her bibliography is here.
Rest in peace, Miss Read. We will miss you.

If you're drinking coffee, you're apt to live longer.
The National Institute of Health and AARP's recent study of 400,000 is the largest ever...and surprised the pants off researchers, who expected to show that coffee was the Ever-Growing Kiss of Death. Earlier studies had suggested that coffee raised LDL levels ('bad' cholesterol), as well as blood pressure short-term...and those combined do pose a risk of heart disease.
"Even in the new study," according to the Associated Press article by Marilynn Marchione, "it seemed coffee drinkers were more likely to die at any given time. But they also tended to smoke, drink more alcohol, eat more red meat and exercise less than people who don't drink coffee. Once that was taken into account, a clear pattern emerged: Each cup of coffee per day [caffeine or no caffeine] nudged up the chances of living longer."
They just don't know why. (See the report here.)
While trying to face the day, first cup of coffee in hand, I enjoy a dip now and then in Miss Read's books. Miss Read, in case you're unfamiliar with her, has a whole English countryside of several towns, and vivid characters, waiting to meet you. They're "cosies," snippets and tidbits of these people's activities all year round -- and a refreshing change from your own. Her Christmas stories are unparalleled, too. (The nearest I can get, American-wise, is Jan Karon's work.)
Anyhow, Miss Read's people love to add baked goods to their tea and coffee, including something called 'eccles cakes.' Wikipedia defines them as "a small, round cake filled with currants and made from flaky pastry with butter, which is sometimes topped with demerara sugar." They seem to be something like a date-filled or fruitcake cookie. (The Mama makes a sugar cookie filled with ground raisins that seem to be like these. Looks more like a pancake in the photos, but you eat them out of hand.) Some sources say they're similar to the Banbury cakes of the nursery rhyme...but that doesn't help us Yanks much.
Here's what the Salford City Council, home of the Eccles cake, says about it:
In 1793 James Birch’s shop on the corner of Vicarage Road in Eccles began selling small, flat, raisin-filled cakes. They sold, quite literally, like hot cakes!
Earlier, in 1769, Mrs Elizabeth Raffald, the housekeeper and owner of a confectioner’s shop in Arley Hall, Cheshire, wrote an influential cookery book, "The Experienced English Housekeeper
Whatever the murky origins of the cakes, James Birch was certainly the first person credited with selling them on a commercial basis...
Whether James Birch made a name for his cakes in the 1780s, in 1796, or indeed some time later, is now impossible to say. It is equally impossible to construct a link between James Birch and Elizabeth Raffald (who died four years before the opening of Birch’s shop).
More recently the question of origin of Eccles Cakes has been raised in Parliament. A question was tabled regarding the future of cakes made outside Eccles to the same ingredients. Could non Eccles-made cakes still be referred to (and sold) as Eccles cakes?
How many cakes, cookies or cupcakes do we know that are worthy of being debated in Congress?? Back to the story:
Throughout history, families making Eccles and (the similar) Banbury cakes have all kept their recipes as closely guarded secrets. One of the most famous expressions in Eccles is "The secret dies with me!".
The authors of cookery books would therefore have had to invent their own recipes based on the taste of the cakes they purchased at different shops. 17th Century recipes for Banbury cakes do exist but show that they differ from 19th Century ones. A major difference was the use of yeast which was necessary before the introduction of raising agents.
Although no 18th Century and only a few 19th Century cookery books give recipes specifically for Eccles cakes, it may well be that early ones differ from those known today.
Mrs Raffald’s original recipe for "sweet patties" of 1769 was a mixture of the meat of a boiled calf’s foot (gelatine), plus apples, oranges, nutmeg, egg yolk, currants and French brandy enveloped in a good puff pastry which could be either fried or baked. The use of the word "meat" [or "mincemeat"] in the early recipes serves as a reminder that meat was originally an ingredient in mincemeat.
The fact that Eccles cakes were being exported by 1818 also suggests very good keeping qualities, so they may well have included spirits such as brandy and rum. No wonder the Puritans wanted to ban them.
Well, gee. I'd better go dig that calf's foot out of the freezer, and resurrect the French brandy -- or maybe I'll just use the modern recipe below. Surprise your family with this venerable goodie, or have one yourself, preferably while reading something by Miss Read. (I'd recommend Village School or Christmas Tales, for starters, or the first one I ever read -- Mrs. Pringle.)
ECCLES CAKES (courtesy of the Salford City Council)
- 1lb 2oz/ 500g puff pastry
- 1oz/ 25g butter, melted
- Pinch freshly ground nutmeg
- 2 oz/55g candied peel
- 4 oz/ 110g sugar
- 8 oz/ 225g currants
Preparation:
Pre-heat oven to 425°/220°C/Gas 7- In a medium saucepan, combine the sugar and butter and cook over a medium heat until melted.
- Off the heat, add currants, candied peel and nutmeg.
- On a lightly-floured surface, roll the pastry thinly and cut into rounds of about ¼ inch/0.5cm thickness and 4 inch/10cm diameter.
- Place a small spoonful of filling onto center of each pastry circle.
- Dampen the edges of the pastry with a little cold water and draw the edges together over the fruit and pinch to seal.
- Turn over the patty over, then press gently with a rolling pin to flatten the cakes. Snip a V in the top with scissors. Place on a greased baking tray.
- Brush with water and sprinkle with a little extra sugar.
- Bake in the preheated oven for 15 minutes or until lightly browned round the edges.
- Place on a wire rack and allow to cool.Try not to eat them all at once!
Update: While researching this, I discovered Miss Read, aka Dora Saint, died back on April 7 -- just 10 days short of her 99th birthday. She may not have had the notoriety of a Robert Ludlum or Clive Cussler...but her books were never out of print. Reading them, I felt as if I were talking to an old and trusted friend. Take a look at her obituary for more. Her bibliography is here.
Rest in peace, Miss Read. We will miss you.
Sunday, May 27, 2012
Happy Memorial Day!
THANK YOU to those soldiers and patriots, past, present and future, who honor our country with their lives and their commitment.
We appreciate it so much.
Have a great, restful weekend.
Friday, April 20, 2012
Flat-Broke Food: The Grand Finale
By now, you've worked your way through a week's worth of foods that are a triple threat: frugal, easy to make and most of all -- tasty. Need more ideas? You'll find my personal list on the Brickworks blog: A Dozen Frugal Cookbooks You've Never Heard Of (Plus Two You Have). There are many more dishes out there to try, especially in cookbooks that detail other countries' cuisines. Thanks to a Denver restaurant, New Saigon, I've been inspired to fool around with Vietnamese food (lighter, spicier, lots of fresh veggies.). Thai food is also on my culinary horizon, after some preliminary messing around with curries and Thai noodles. Oh, the burden of getting to cook delicious, interesting food! (limp hand to forehead)
Enjoy the journey. We'll be back with more recipes and ideas around May Day, then will present a Week of Barbecue just in time for Memorial Day weekend. Come on back and visit -- or better yet, sign up to 'follow' or subscribe to e-mail, so you don't miss a single, succulent bite.

Enjoy the journey. We'll be back with more recipes and ideas around May Day, then will present a Week of Barbecue just in time for Memorial Day weekend. Come on back and visit -- or better yet, sign up to 'follow' or subscribe to e-mail, so you don't miss a single, succulent bite.
Flat-Broke Food: Whacky Cake!
I hope you've been enjoying this week of frugal food. Many of these recipes are from our cultural past -- it may confuse us sometimes, but Americans have been very fortunate to be able to choose from so many cultures for our food and pastimes. How could our country have gotten so far, without all these different contributions to the cultural pot? The answer is -- we couldn't.
The last in this particular batch is a cake that grew out of shortages, particularly WWII and the Depression. Eggs were not always obtainable, unless you lived on a farm; milk could also be scarce. And much of the country's snacks, including chocolate, went to the troops.
Enter a moist, chocolaty cake that undoubtedly emerged out of desperation from some housewife's creative mind. It takes less than ten minutes to stir up -- and it can be mixed right in the pan. (She must have been busy.) Either her pantry was empty, or she was just 'out:' this cake uses no eggs -- milk -- butter -- chocolate chips. And it's low in fat. (Take note -- great for vegans, those watching their weight, or people with allergies.)
The magic ingredients: cocoa -- and vinegar!
WHACKY CAKE
1 cup sugar
1 1/2 cups flour
3 tablespoons cocoa
1 teaspoon soda
1/2 teaspoon salt
1 tablespoon vinegar
1 teaspoon vanilla
6 tablespoons oil (1/4 cup, plus one tablespoon -- I use olive oil)
1 cup water
Set your oven to 350 degrees. Pour the dry ingredients into a 8" square or round pan -- mix, and shape three wells in the dry stuff. (You can also mix in a bowl.) Pour the liquid ingredients in, water last, and quickly mix. Bake for 30 min., or until a toothpick is dry when inserted in the center.
This recipe can be easily doubled for a 9x 13 pan or bundt/angel food cake pan; it may take up to 45 min. to bake.
This cake is tasty served as-is, or with a sprinkle of powdered sugar. Or, for you spendthrifts out there who can afford butter and cream (!!!), add an easy frosting. It's very similar to that used for German chocolate cake.
FAST & EASY ICING
1/3 cup softened butter or margaine
2/3 cup brown sugar
1/4 cup cream
1/2 cup chopped nuts
1/2 cup coconut
Mix butter, sugar and cream together; add nuts and coconut. Frost your cake while it's still warm. Watch your guests gobble it down...and smile to yourself.
Thursday, April 19, 2012
Flat-Broke Food: Chowder en Pisces
Fish-head stew. It's what Charlie's mom served in the movie Chaplin, when they were dead broke and about to get thrown out of their flat. Fish heads are certainly cheap: I just saw salmon heads at our local Vietnamese fish market for less than $1 a pound. (And salmon is running about $8-12/lb around here in Colorado -- $5.99/lb on sale.)
But can they be tasty?
Yes -- if you follow a few standard rules. First, get them as fresh as possible. Next, look for the biggest heads you can find -- like salmon or sturgeon. (Salmon cheeks are actually considered a delicacy!) Ask the meat department clerk at your local grocery store. They may be discarding the heads when they process fish, and will be glad to sell them cheap -- or even give them away.
Finally, cook them first to remove the meat: scrub the heads in warm water with a little vinegar, cover with fresh boiling water, and gently simmer until the meat is firm and flakes easily. Pull the meat off, and use it in your favorite recipe. (Discard any fat - it's what gives it that fishy taste -- preferably to your dog or cat!)
Once it cools, pour out the cooking water on any plants that could use the extra nutrients. The bones can be buried near plants, as well.
This fish is wonderful in pasta or a casserole. Or try it in a chowder, like this 'receet' inspired by one in Stories and Recipes from the Great Depression of the 1930s, Vol. III, by Rita Van Amber.
STURGEON HEAD CHOWDER
approx. 2-4 pounds meat from larger fish heads
(Two sturgeon heads will give you about 3-4 pounds meat. Substitute 2-3 pounds salmon heads, if you prefer, or other fish heads. Prepare the heads first, using the instructions above. If you think this will bother your guests or family, tell them after the meal -- or not at all. This is our secret.)
6-10 cups chicken broth
(or use water and 5 chicken bouillon cubes.
A few cups of meat gravy, plus water, can be substituted)
5-8 potatoes
1 onion
3 carrots
3 tablespoons flour
1 cup milk
Start the broth; while it's heating, dice the meat and chop the vegetables. Dump everything into the simmering broth, and let cook for about 30-45 min. (Or 3-4 hours on low in a crockpot.) Add more water as needed to keep it at soup consistency.
Mix flour in milk, pour it in and stir until the soup thickens. "Do not boil after you add the milk mixture; keep it just below the boiling point. Salt to taste and add all the pepper your family can enjoy. I like it to warm me as it goes down..."
(thanks to Carl Holland for his contribution. Serves from 4-8)
Flat-Broke Food: Emergency Pantry
We all hit times when things are looking a tad sparse in the food department. That's not so bad -- for one thing, it means that you're cycling through your food supplies without wasting much. For another, it gives you a fresh place to start from.
First, figure out what you've got. Check the frig -- freezer -- shelves.
Second, tidy up. This is a perfect chance to wipe down shelves and scrub out the veggie crisper. Your kitchen will look and smell better for it. (While you're at it, scrub the floor, too. Makes you feel very efficient.)
Now you're ready. Begin with the basics. Eggs, butter, milk and flour can make pancakes and bread. Biscuits are not difficult, either. Olive oil is healthier than many other types, and can be used in a variety of ways. Popcorn (great for snacks), oatmeal, dry beans (pintos are cheapest around here) and rice keep a long time -- buy them in as large a package as you can afford. (Noodles are good, but can be made by hand. Buy macaroni or pasta instead, if your money is tight.) Add brown and white sugar, baking powder/soda and salt, and you've got a solid start.
Coffee and tea are nice to have around, as well -- but if need be, you can wait on those. Grinding your own coffee beans gives a fresher taste, and using a 'British-style' tea (we Americans are such wimps in this department) gives you a stronger cup.
Next, add as few or many spices as you can afford. Dried onion and garlic flavor any dish nicely. I also rely on cinnamon, nutmeg, marjoram, basil, oregano (look for a good Italian blend, if you prefer), curry and chili powder, mustard. A bottle of hot sauce is a must; add bottles of ketchup, barbecue sauce, steak or Worcestershire sauce when you can, as well as a jar of onion soup mix. (Dole the latter out sparingly to zip up homemade soup, or add a tablespoonful to your meatloaf.)
Now look at what fresh vegetables you can afford. Root veggies, like onions, carrots and potatoes, are a standard, and generally cheaper than the others. (Tip: buy a bunch of green onions, if the larger ones are expensive -- they'll flavor your food nicely, and add color.) A bunch of spinach not only will serve for salads, but is good chopped into soup, stews or casseroles. For fruit -- what's on sale? If nothing looks appealing (or cheap enough), bananas are usually the next option. (Don't forget canned peaches, pears, oranges, either.)
And finally on the list: a loaf of bread, corn and flour tortillas. Crackers, if you can. A few extra cans of vegetables, corned beef hash, soups, etc. will fill out your cupboard and give you quick meals at short notice.
The ten things I think should always be in a pantry? I'd add these, too.
This basic pantry can help you head in all sorts of culinary directions, at surprisingly little cost.
Subscribe to:
Comments (Atom)